Homey Energy + PELS
Homey Energy is the energy foundation PELS builds on: whole-home power, dynamic electricity prices, and per-device energy reporting all in one place. PELS takes that foundation and acts on it — when you approach your hourly capacity limit, devices get turned down; when electricity is cheap at 3 AM, the water tank preheats.
PELS is the active control layer on top of Homey Energy. It reuses the data Homey already collects and turns it into automatic, hour-by-hour decisions across every managed device.
If you want a quick overview of how Homey Energy works, see Homey Energy management and Understanding the Homey Energy tab.
What does PELS add?
If you are already using Homey Energy, here is what PELS gives you on top:
Automatic capacity control
PELS watches your total power consumption and automatically lowers, pauses, or turns off heaters, water tanks, or EV charging before you exceed your hourly limit. When there is available power again, it resumes them in the right order, based on priority. This keeps you within your grid tariff step (effekttrinn) without you having to watch the meter.
Read more: Getting Started · Configuration
Price-based load shifting
PELS reads hourly electricity prices and shifts heating to the cheapest hours of the day. During expensive hours it reduces temperatures; during cheap hours it preheats. You set the temperature adjustments per device and PELS handles the rest.
Read more: Configuration — Settings > Electricity prices
Modes and priorities
Set up profiles like Home, Away, Night, or Vacation with different target temperatures and priorities. PELS switches between them automatically via Flow cards, so your comfort settings adapt to your schedule.
Read more: Configuration — Settings > Modes
Daily energy budgets
Set a daily kWh target and PELS paces managed load across the day. It gives cheaper hours more room and holds back when you are ahead of budget.
Read more: Daily Energy Budget
Getting started
If PELS is not installed yet, get it from the Homey App Store. Setup takes about 15 minutes — see the Getting Started guide for a full walkthrough.
The two sections below cover how to point PELS at your Homey Energy data specifically. You can use one or both — they are independent settings.
Power metering via Homey Energy
Homey Energy already knows your total home consumption. Instead of creating a Flow to feed that value to PELS, you can tell PELS to read it directly.
Setup
- Open Apps > PELS > Settings.
- Go to Settings > Limits & safety.
- Change Power source to Homey Energy.
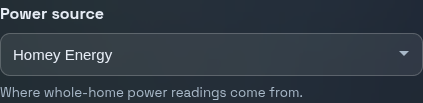
PELS starts polling every 10 seconds. The Overview tab should show live power data within moments.
Per-device energy reporting
Homey Energy is also the source of per-device energy reporting. Some devices report their own power directly; others rely on Homey's estimated usage and the values configured in the device's Energy settings. PELS reads from the same place Homey does — fix a wrong Energy value in Homey once and both surfaces update.
If a device's energy data looks off, the canonical fix is in Homey's Energy settings. PELS picks the corrected values up on the next planning cycle.
Requirements
Your power meter must be paired with Homey and have Tracks total home energy consumption enabled in its device settings. This is the same cumulative reading Homey shows as "Total home consumption" in the Energy dashboard.
Common meters that work: Tibber Pulse, P1/HAN readers, Shelly EM, or any device Homey recognizes as a whole-home energy tracker.
When to use the Flow card instead
- Your meter is not tracked by Homey Energy.
- You want to combine multiple sources or apply custom calculations before feeding the value to PELS.
TIP
You can switch between the two sources at any time. The change takes effect immediately — no restart needed.
Electricity prices via Homey Energy
If your Homey has dynamic electricity prices configured, PELS can read them directly instead of fetching prices from its own sources.
This is the recommended path outside Norway. PELS ships a built-in Norwegian spot price source with full grid-tariff and electricity-support calculation, and outside Norway, Homey Energy delivers the same all-in hourly prices straight into PELS — every supported country, no extra configuration.
Setup
- Open Apps > PELS > Settings.
- Go to Settings > Electricity prices.
- Change Price source to Homey Energy (dynamic prices).
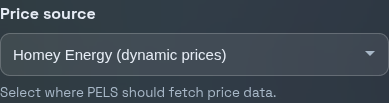
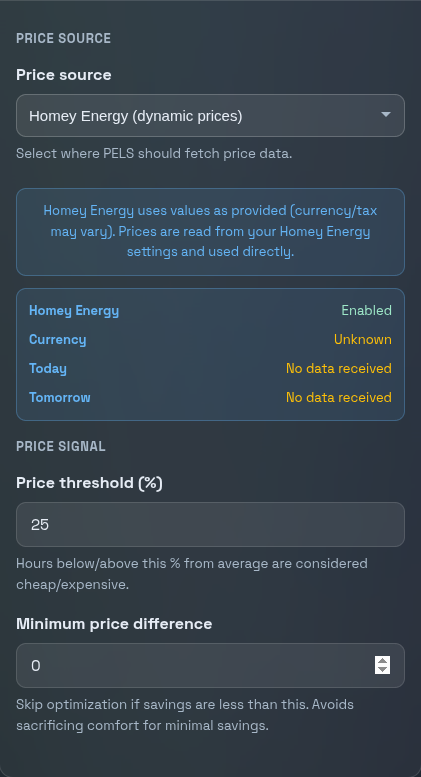
PELS fetches today's and tomorrow's prices and uses them for price-based optimization. The status card below the selector confirms whether data is flowing.
How prices are used
PELS uses the prices Homey Energy publishes directly — whatever your country and provider include in those numbers is what the planner optimizes against.
Each hour is classified as cheap, normal, or expensive based on a configurable threshold (default: 25% from average). You then set per-device temperature adjustments — for example, +4 degrees during cheap hours and -4 during expensive hours. PELS applies these automatically.
Read more: Configuration — Settings > Electricity prices
When to keep using Norway pricing
If you are in Norway and want PELS to calculate the full cost including grid tariffs (nettleie), provider surcharges, and electricity support (strømstøtte), use the built-in Norway (spot + grid tariff) source instead. It gives you more granular control over each cost component.
Using both together
You can use Homey Energy for both power metering and electricity prices at the same time:
- Power source is in Settings > Limits & safety.
- Price source is in Settings > Electricity prices.
A typical setup for someone outside Norway: set both to Homey Energy and you are done — no Flows needed for basic operation. From there, configure your hard cap, pick which devices to control, and set up price response.
Next steps
- Getting Started — full setup walkthrough
- Configuration — every setting explained
- Flow Cards — trigger modes, report power, and more from Homey Flows
- Tips and Best Practices — practical advice for getting the most out of PELS